
What is Puck Preparation and Why It Matters
Puck preparation involves distributing and tamping ground coffee in your basket to create an even density throughout the coffee puck. When water is forced through this puck under high pressure, it should encounter uniform resistance, extracting flavors consistently from all the coffee particles.
Poor puck prep leads to channeling. Water easily finds paths of least resistance through the coffee bed, resulting in under-extraction in some areas and over-extraction in others. This creates shots that taste both sour and bitter, lack sweetness, and cause spraying if you are using a bottomless portafilter.

Commonly Used Puck Preparation Tools
Here are some commonly used espresso distribution tools.
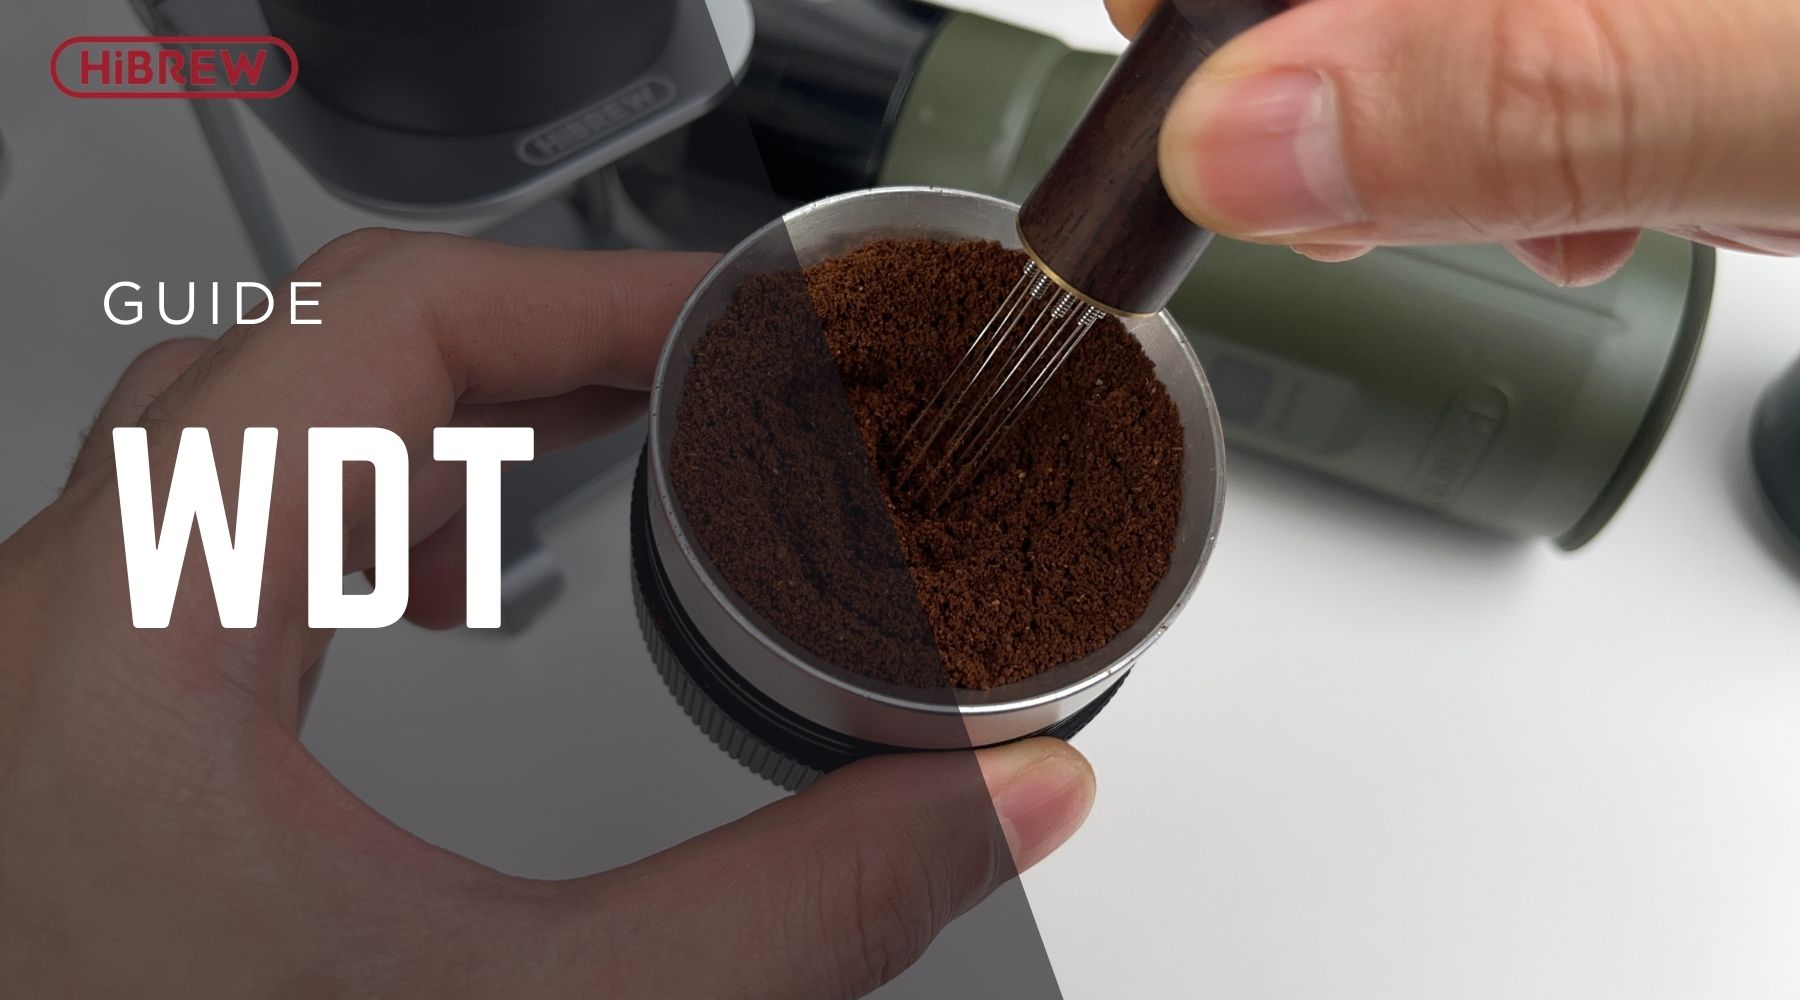
WDT Tool (Weiss Distribution Technique)
The WDT tool features several thin needles (typically 0.3-0.4mm in diameter) used to break up clumps and evenly distribute coffee grounds throughout the basket.
Previously we've shared a detailed guide about WDT, check out our Espresso WDT Guide here.
Effective WDT tools use needles thin enough to move through the grounds without creating large channels. Many home baristas make DIY versions using acupuncture needles or 3D-printed designs. There are also many commercial options offering improved ergonomics and better efficiency.
Dosing Funnel
A dosing funnel sits on top of your portafilter basket, preventing coffee grounds from spilling during grinding and distribution. This simple tool keeps your workspace clean and makes puck prep much easier. We recommend using it with the WDT tool.

Distribution Tool
Distribution tools (sometimes called levelers) feature a flat base that spins against the coffee bed, creating a level surface before tamping. These tools typically offer adjustable depth settings to accommodate different dose sizes.
While distribution tools excel at creating a perfectly flat surface, they work best when used after WDT rather than as a replacement for it. The spinning action primarily affects the top layer of coffee rather than addressing clumps throughout the entire basket.
Tamper
The tamper compresses the coffee grounds into a compact puck that provides appropriate resistance to brewing water.
Many machines only provide a simple plastic tamper that doesn't work well. The HiBREW team deeply understands the importance of tamping, so we have equipped our main espresso machines like the H10A, H10B, H7B with solid metal tampers that fit perfectly with our 58mm baskets.

There are also other types of tampers that improve the consistency and efficiency.
- Calibrated tampers provide consistent tamping pressure (some with replaceable springs)
- Self-leveling tampers ensure the tamping surface remains parallel to the basket rim
Puck Screen
A puck screen is a fine metal mesh disc placed on top of the tamped coffee puck before brewing. These screens mainly designed for more even water distribution across the puck surface. Also, there will be fewer coffee particles reaching the shower screen so that a simple purge can clean the brew head after brewing.
Some baristas also use paper filters (either above or below the puck) to reduce fines and oils in the final shot. These can create a cleaner-tasting espresso with less intensity but more clarity.
The Complete Puck Preparation Process

Step 1: Grinding and Dosing
HiBREW G5 grinder comes with a slim dosing cup that helps easily transfer the grounds to the basket.
- Remove your portafilter from the group head and dry it thoroughly (Make sure it's dry)
- Attach your dosing funnel to prevent spillage
- Pour your coffee grounds to the basket from the dosing cup.
Step 2: WDT (Weiss Distribution Technique)
- Insert your WDT tool needles into the coffee bed
- Start from the bottom of the basket and work upward
- Use gentle circular motions to break up clumps
- Focus on creating even density throughout the entire basket
- Pay special attention to the edges and center, where density often varies
Effective WDT should result in a fluffy, even bed of coffee with no visible clumps.
Step 3: Leveling the Surface
- Remove the dosing funnel
- Use a distribution tool set to an appropriate depth
- Spin the tool to create a perfectly level surface
- Focus on spreading the top layer evenly without compressing too deeply
The goal is to create a flat surface for tamping, not to replace proper distribution throughout the basket.
Step 4: Tamping
- Apply firm, level pressure
- Keep your wrist straight and elbow directly above the portafilter, make sure you don't lean to one side
- Focus on creating a flat, even surface rather than applying excessive pressure
- Maintain consistent technique from shot to shot
Step 5: Final Check and Optional Additions
- Inspect the puck for evenness and cleanliness
- Add a puck screen if desired
- Use a brush to clean any excess grounds from the basket rim and ears
- Lock the portafilter into the group head
Benefits of Proper Puck Preparation
Improved Espresso Extraction Quality
A well-prepared puck creates uniform resistance to water flow, ensuring all coffee particles contribute equally to the final shot. This results in:
- More balanced flavor profiles
- Enhanced sweetness and reduced bitterness
- Clearer expression of origin characteristics
- Smoother mouthfeel and improved texture
Increased Consistency
Establishing a reliable puck prep routine dramatically improves shot-to-shot consistency. When your preparation is consistent, you can:
- Make meaningful adjustments to grind size and dose
- Develop your palate by comparing similar shots
- Troubleshoot extraction issues more effectively
- Dial in new coffees with greater precision
This consistency is particularly valuable when working with light roasts or single-origin coffees, which can be more challenging to extract evenly.
Better Workflow and Less Waste
Good puck preparation tools and techniques lead to:
- Cleaner workspaces with less coffee scattered around
- Reduced coffee waste
- More streamlined brewing process
Troubleshooting Common Puck Preparation Issues
If your espresso shows signs of channeling (uneven flow, spurting, or fast shots), consider:
- Using a WDT tool more thoroughly, especially around the edges
- Ensuring level tamping with consistent pressure
- Checking for appropriate dose for your basket size
- Examining your distribution technique for areas of uneven density
- Adding a puck screen to improve water distribution
Visual inspection of used pucks can reveal channeling—look for holes, cracks, or uneven coloration that indicates water found easier paths through certain areas.

Conclusion
Mastering puck preparation is one of the most impactful ways to improve your espresso quality at home. By investing in a few puck prep tools and developing a consistent routine, you'll extract more flavor from your coffee while reducing waste and frustration.
Sometimes we think our puck prep is already perfect, but when extracting with a bottomless portafilter, espresso still sprays everywhere. Don't be discouraged—Good puck preparation technique requires practice. Once you master puck prep techniques, you can make the most out of HiBREW's espresso machine and enjoy coffee shop-quality espresso at home.

Laisser un commentaire
Tous les commentaires sont modérés avant d'être publiés.
Ce site est protégé par hCaptcha, et la Politique de confidentialité et les Conditions de service de hCaptcha s’appliquent.